


Step-by-Step Installation Guide for Custom Puddle Lights Made Easy
Adding personalized puddle lights to your vehicle is a great way to improve its convenience, safety, and style. Whether you want to install branded logo projectors or stylish LED lights, this detailed guide will help you make sure the installation goes smoothly and expertly. Let's get started with the detailed instructions for installing a unique puddle light!
Introduction to Custom Puddle Lights
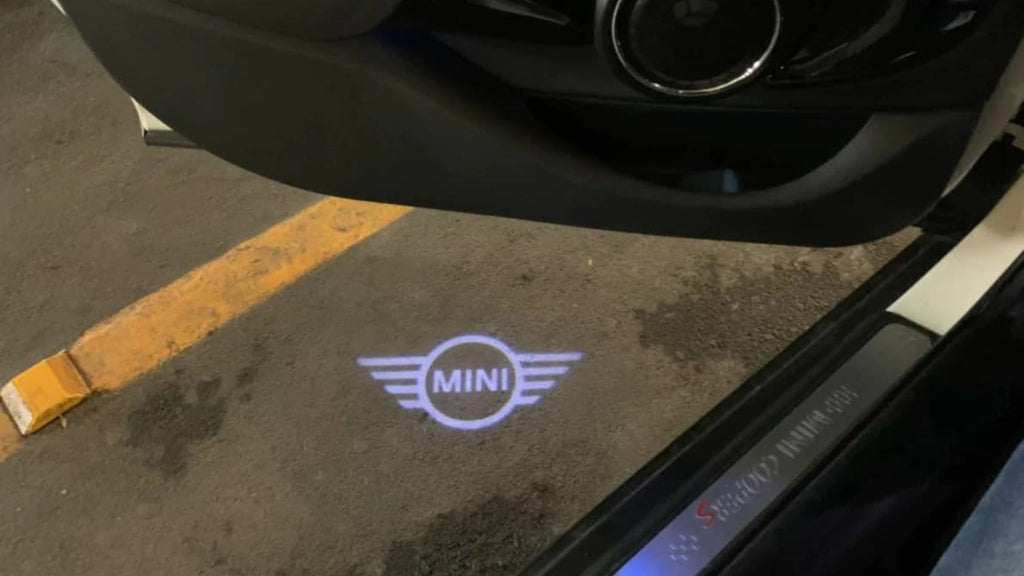
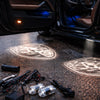
Custom puddle lights are a great way to add style and functionality to your vehicle. They can be installed on car doors to provide a unique and personalized look.
Installing puddle lights can be a fun and rewarding DIY project. With the right tools and materials, you can add a unique feature to your car without breaking the bank.

Understanding Your Car’s Electrical System
-
Locate the fuse box and identify the wires that control the interior lights.
-
Use a wiring diagram specific to your car model to avoid any confusion.
-
Understanding your car’s electrical system is essential before starting the installation.
-
Make sure to use the correct wires and connections to avoid any electrical complications.
Preparing Your Car for Installation
-
Gather all the necessary tools and materials, including LED puddle lights, wires, and a drill.
-
Remove the door panels to access the interior of the doors.
-
Take note of any cables or holding mechanisms to avoid damaging them.
-
Use a screwdriver to carefully remove any screws or clips.
Using LED Lights for Interior Lighting
-
LED lights are brighter and last longer than traditional bulbs, making them a great option for car enthusiasts.
-
They can be used to upgrade the interior lighting of your vehicle.
-
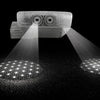
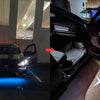
LED lights can be installed in the dome light, door lights, and footwell lights for a modern touch.
-
They can also be used to create a unique and personalized look.
Installing Puddle Lights: A Step-by-Step Guide
Things You'll Need
-
Personalized puddle lights (LED or projector lights with a logo)
-
A prying tool or screwdriver
-
Crimpers and wire strippers (for splicing wires)
-
Electrical tape or heat-shrink tubing
-
Dielectric oil
-
Sealant made of silicone (for weatherproofing)
-
Multimeter (optional; used for connection testing)
-
Manual for the owner (for reference)
Compile Data
Make sure you've bought the appropriate custom puddle lights for the make, model, and year of your vehicle before beginning your do-it-yourself project. Read the installation instructions that came with the lights and consult the manufacturer's compatibility list.
Cut the battery off
To avoid any accidents or electrical shorts while setting up the custom car door puddle lights, disconnect the negative terminal of your vehicle's battery for safety.
Disconnecting the Battery and Removing Panels
-
Disconnect the car battery to prevent any electrical complications during the installation process.
-
Remove the door panels to access the interior of the doors.
-
Use a screwdriver to carefully remove any screws or clips.
-
Take note of any cables or holding mechanisms to avoid damaging them.
Feeding the Wires and Mounting the Puddle Lights
-
Feed the wires through the door panel to connect to the electrical system.
-
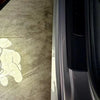
Mount the puddle lights to the door panel using screws or adhesive.
-
Make sure they are securely attached and won’t interfere with the door closing.
-
Use a level to ensure the puddle lights are properly aligned.
Take out the mirror housing or door panel.
The door panel or side mirror housing containing the puddle light should be gently removed using a screwdriver or pry tool.
For detailed information on how to remove these parts without causing damage, consult your owner's handbook.
Find the Old Puddle Light and Take It Out
Determine which puddle light is currently in use and unplug its electrical harness.
Depending on the design, remove the old light by unscrewing it or carefully prying it out.
Installing Door Lights
-
Install the new lights by connecting them to the electrical system.
-
Use a wiring diagram specific to your car model to avoid any confusion.
-
Make sure to use the correct wires and connections to avoid any electrical complications.
-
Test the front door lights to ensure they are working correctly.

Connecting to the Electrical System
-
Connect the wires to the fuse box and the interior lights circuit.
-
Use a soldering iron and solder to connect the wires, or use hot glue to secure the connections.
-
Make sure to match the + and - wires correctly before making the splices.
-
Test the puddle lights to ensure they are working correctly.
Examine the Lighting
Make sure the new puddle lights are working properly by testing them and reconnecting the car battery before reassembling. Verify that the brightness and alignment are correct.
Testing and Troubleshooting
-
Test the puddle lights by opening the doors after the battery has been reconnected.
-
Guarantee that the intended illumination is achieved.
-
Troubleshoot any issues by rechecking the wiring connections if they do not function.
-
Use a multimeter to troubleshoot any issues.
Putting Everything Back Together
Reassemble the car doors and replace the door panels.
Make sure all cables and holding mechanisms are securely attached.
Test the puddle lights again to ensure they are working correctly.
Ensure all fasteners and clips are securely fastened.
Make the Installation Weatherproof
To stop water damage, apply silicone sealant around the puddle light housing's edges. To make sure your bespoke lights last a long time, this step is essential.
Last Verification
After reassembly, test the lights once more to make sure everything is operating as it should. To get the desired lighting effect, adjust the alignment if needed.
Tips for Installing Puddle Lights on Car Doors
The installation of a car puddle light requires patience; take your time so as not to damage any parts.
-
Ensure that the appropriate tools are utilized: Always employ the appropriate instruments for the task to avoid stripping screws or damaging components.
-
Please adhere to the instructions: Follow the instructions that were included with your flood light kit.
-
Take your time: Errors may result from hastily proceeding.
-
Maintain Order: Utilize small containers or sacks to maintain the organization of screws and small components during the disassembly process.
Use High-Quality Products: For enduring performance, spend money on puddle lights that are weatherproof and long-lasting.
Speak with an Expert: If you're unclear about any procedure, get advice from a qualified auto electrician or technician.
In Conclusion
This guide to installing custom puddle lights provides everything you need to complete a DIY custom puddle light installation successfully. Whether you’re installing LED puddle lights on cars or setting up custom logo puddle lights, this step-by-step guide for car puddle lights ensures a professional result. You can install new custom puddle lamps on both the driver side and passenger side that provide a stylish and functional lighting effect as soon as the doors are opened. With proper custom puddle light wiring instructions and attention to detail, you can transform your car’s entry lighting into a stylish and functional feature.
